Introduction

Plesk is a versatile web hosting control panel designed for commercial hosting providers. Compatible with both Linux and Windows, Plesk simplifies the management of web hosting systems and applications on a single server. It automates various administrative tasks, making it easier to set up and manage websites.
With Plesk, server administrators can effortlessly manage new websites, reseller accounts, email accounts, and DNS entries via a user-friendly web interface. Administrators can also create templates for clients and sites, streamlining resource allocation and management.
For more details, visit the official Plesk website: Plesk Official Site.
1. Plesk Template Installation
At BuyCheapVPS, you can quickly and easily install the Plesk template for Linux and Windows hosting KVM VPS with just a few clicks:
Log in to the Client Area.
Go to the "Services" tab and select "VPS."
Click on the "Manage" button for your service.
Click "Install OS."
Choose your operating system, accept the warning, and click "Continue."
Wait 5-10 minutes and refresh the VPS management page.
Initial Plesk Setup
Plesk uses port 8443. To access the control panel for the first time, enter:
http://ip_of_your_server:8443
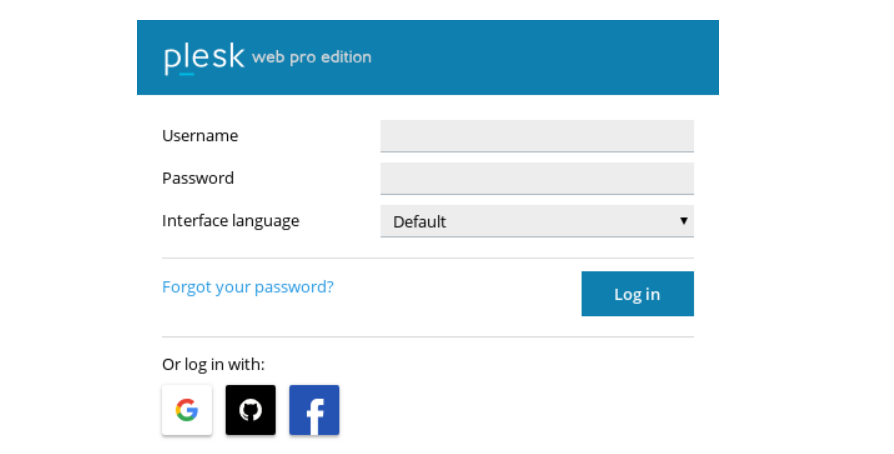
Log in using the "root" credentials provided in the "Login Details" tab of your service management page. For Windows, you can also use the username "Administrator" with the password provided in the Client Area.
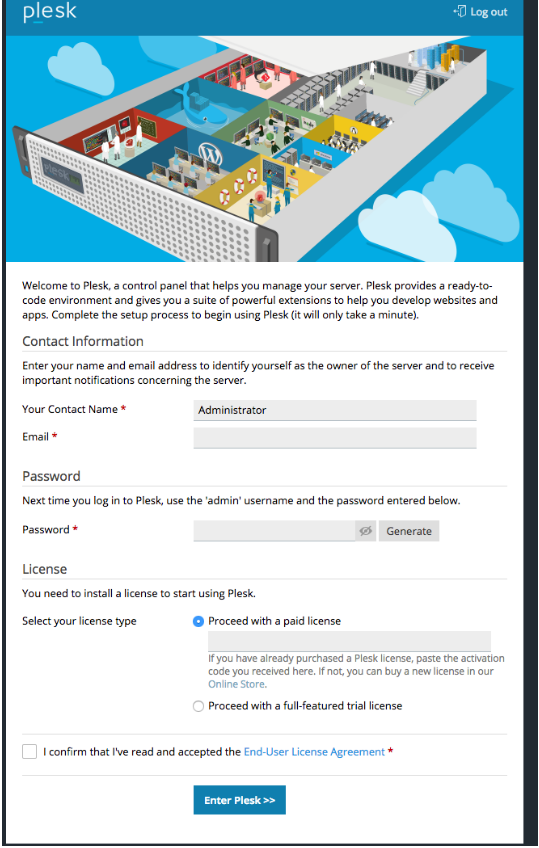
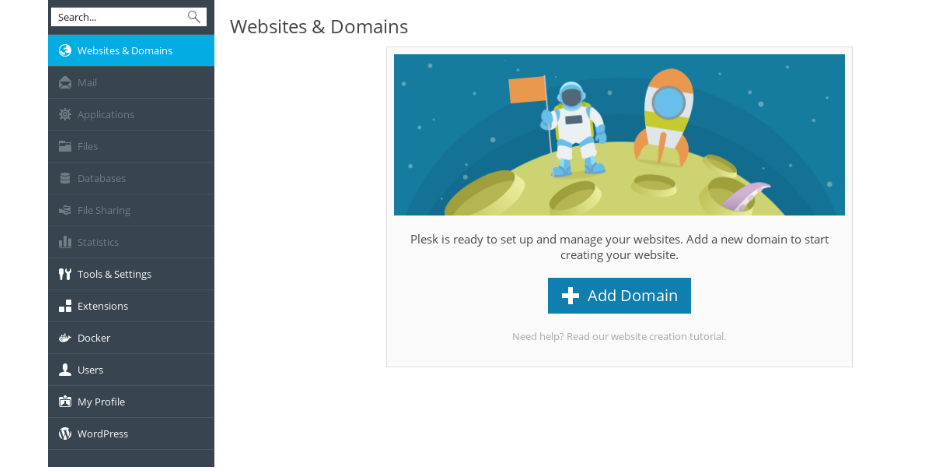
During your first login, you'll need to enter your contact email address, set a password, and input your license key. You'll then be prompted to add your primary domain to unlock the full functionality of the panel.
2. Adding New User Accounts
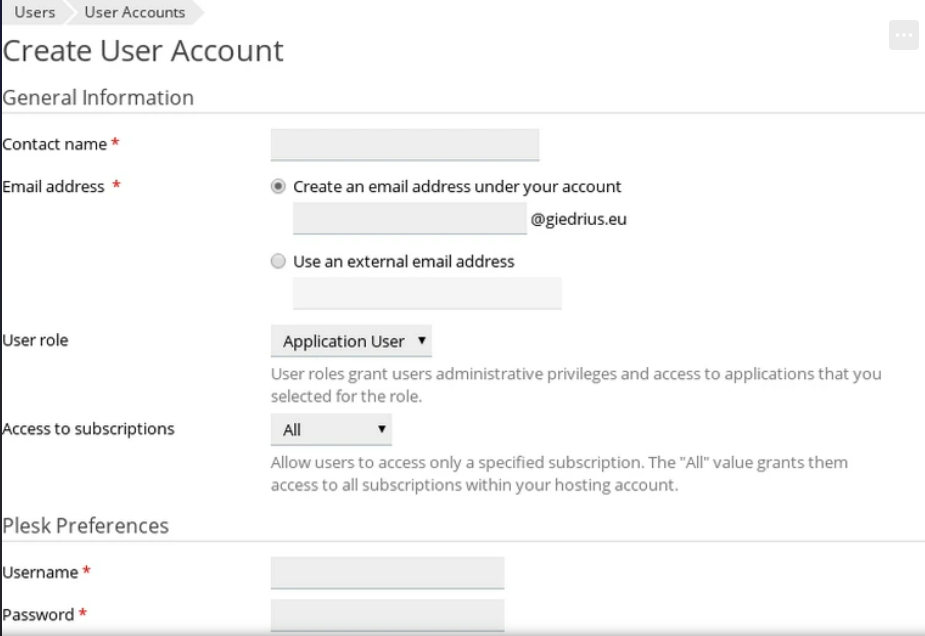
In the left menu, select "Users."
Click "Create User Account."
Fill out the form to create a new user.
3. Creating an Email Account
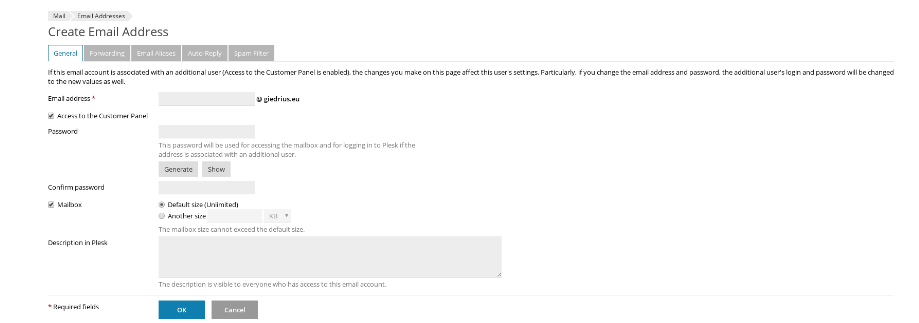
4. Setting Up an FTP User
In the left menu, go to "Websites & Domains."
Choose "FTP Access" and click "Add an FTP account."
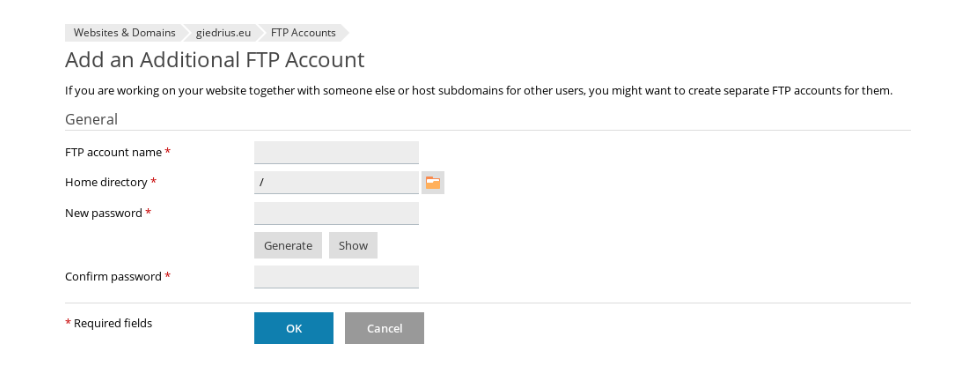
5. Adding a Database
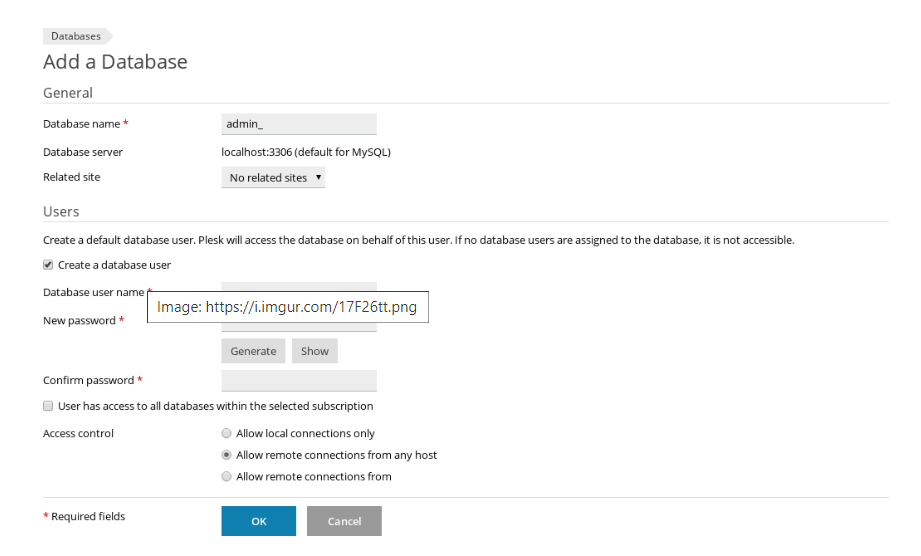
6. Adding an Additional Domain
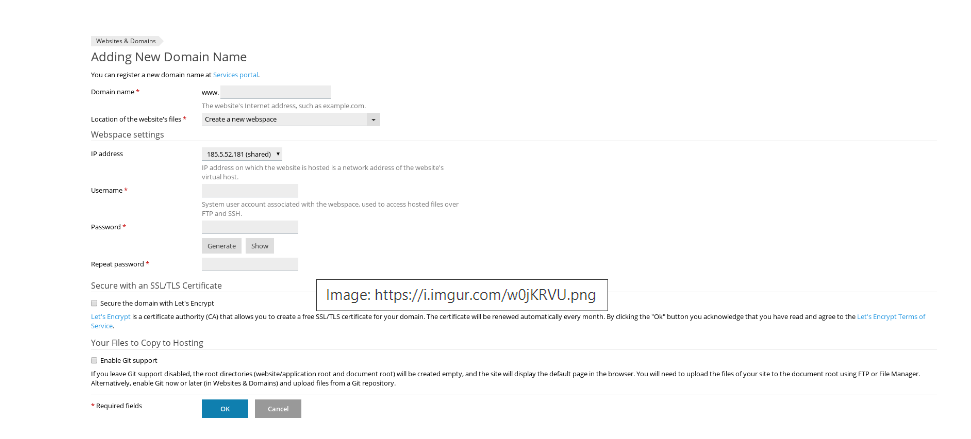
7. Resetting Your Password
In the Plesk UI, go to "My Profile."
Enter and confirm your new password, then save your changes.
Note: Replace "*****" with your actual new password.
For more information about using Plesk with your Linux or Windows hosting, contact our 24/7 customer support or consult the documentation: Plesk Documentation