Introduction
YunoHost is a Linux Debian-based server management system designed to make self-hosting accessible to everyone while maintaining high quality and reliability. Unlike traditional hosting solutions, YunoHost is tailored for use in single-user environments.
You can host websites, services, and email for friends, family, or your company with YunoHost. Trust and mutual confidence between you and your users are crucial. If you plan to offer YunoHost services to strangers, consider providing a full VPS for each user.
YunoHost Installation
To install YunoHost on a Debian 9 VPS, follow these steps:
1. Install YunoHost
After setting up Debian 9, connect to your server via SSH and run:
curl https://install.yunohost.org | bash
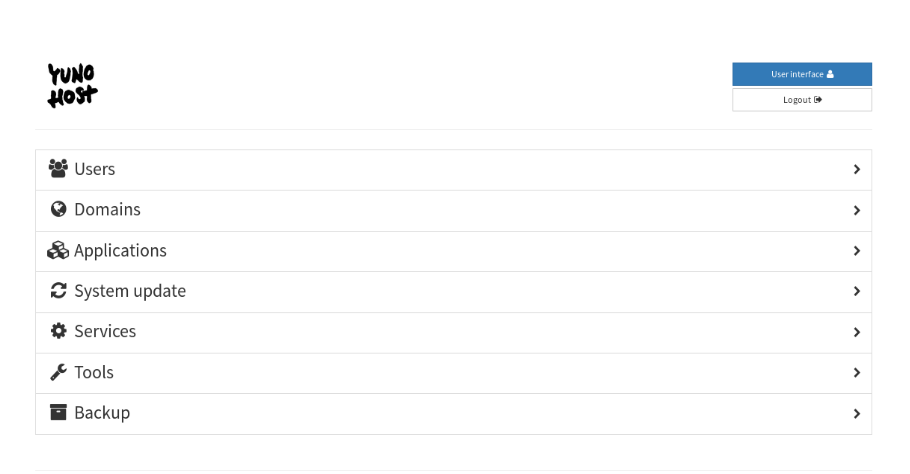
2. Access YunoHost
Open your browser and navigate to:
https://your-hostname.tld/yunohost/admin/#/
Use the root user password from your VPS management page under the "Login Details" tab.
3. Add New Users

Go to the "Users" tab and click the green "+New user" button.
Enter the required information. Usernames must be in lowercase. Without additional domains, email addresses will use the VPS hostname but can be changed later. Email aliases like "root", "admin", "webmaster", and "postmaster" will also be created.
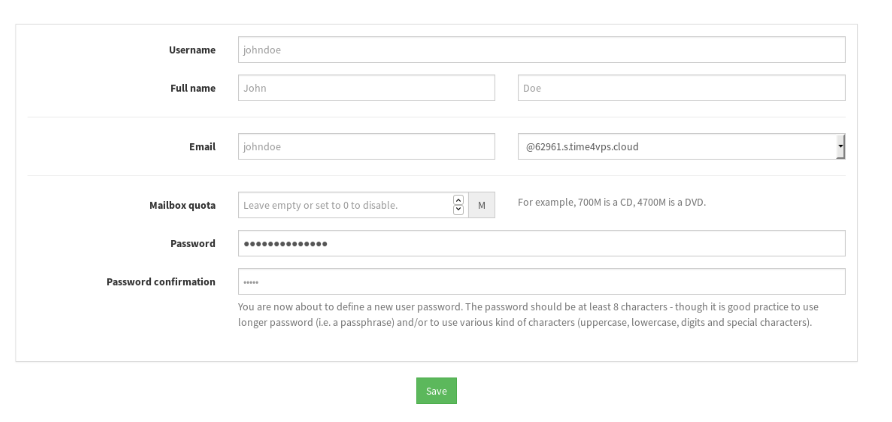
Access the user panel through the "User Interface" button in the top right corner of YunoHost, using the created username and password.
4. Create Additional Email Aliases
- Edit user details by selecting "Users > youruser > Edit youruser's account". Here, you can adjust user details, change passwords, and create additional email aliases or forwarders. Remember to save your changes.
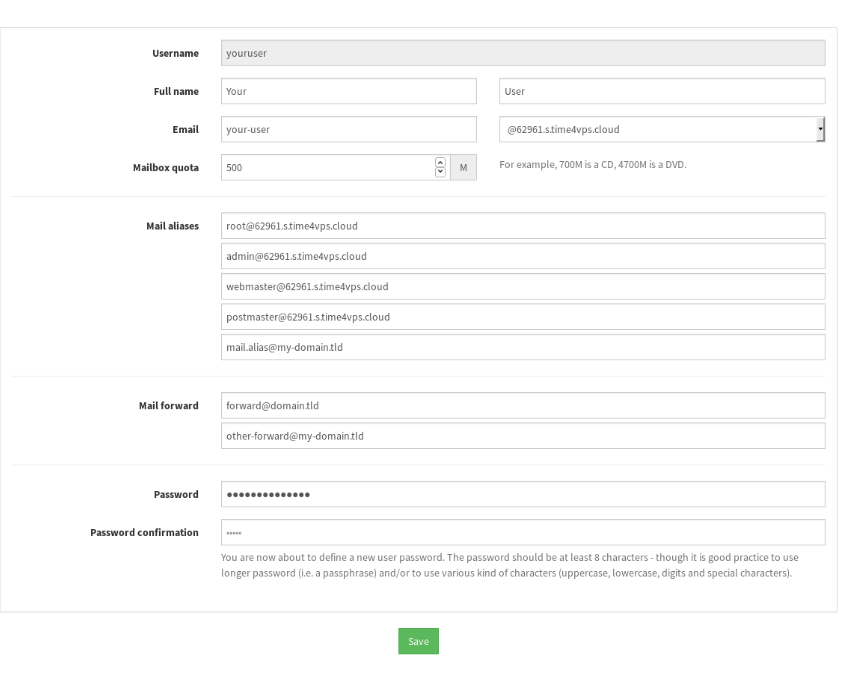
- Configure email addresses with your mail client software. For web access, install RoundCube or Rainloop. Installation instructions are in "Step 5: Installing Needed Applications".
5. Add Domains
Go to the "Domains" tab on the home screen and click "+Add domain".
Choose to add your own domain or use a free YunoHost subdomain (e.g., "nohost.me", "noho.st", or "ynh.fr").

If you add your own domain, you'll need to set up DNS zone records. To find out which records to use, go to the "DNS configuration" section, where you'll see a list of the required records.
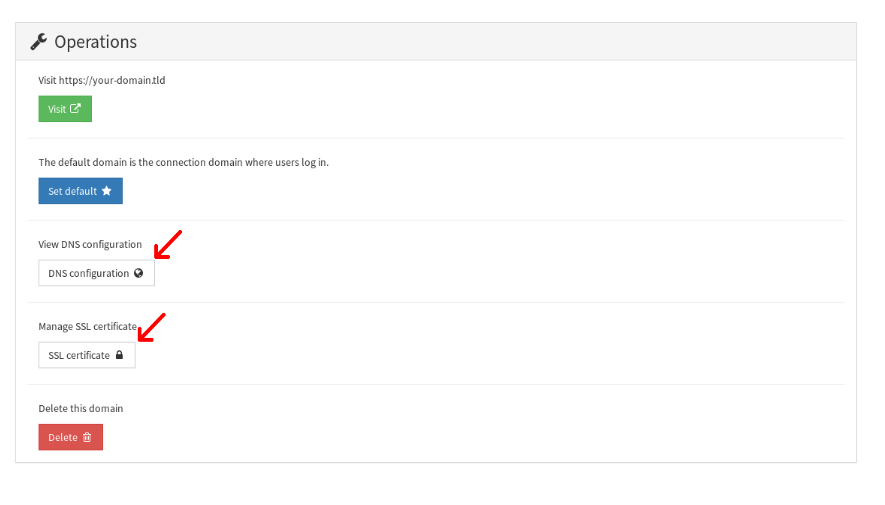
The YunoHost template includes Let's Encrypt, which can generate a free SSL certificate for your domain. To issue a certificate, select the "SSL certificate" option shown in the screenshot above. By default, domains use a self-signed certificate, but you can generate a new one by choosing "Install a Let's Encrypt certificate." The only requirement is that your domain must point to the VPS IP.

.
6. Install Applications
On the Home screen, go to the "Applications" tab and click the green "Install" button.

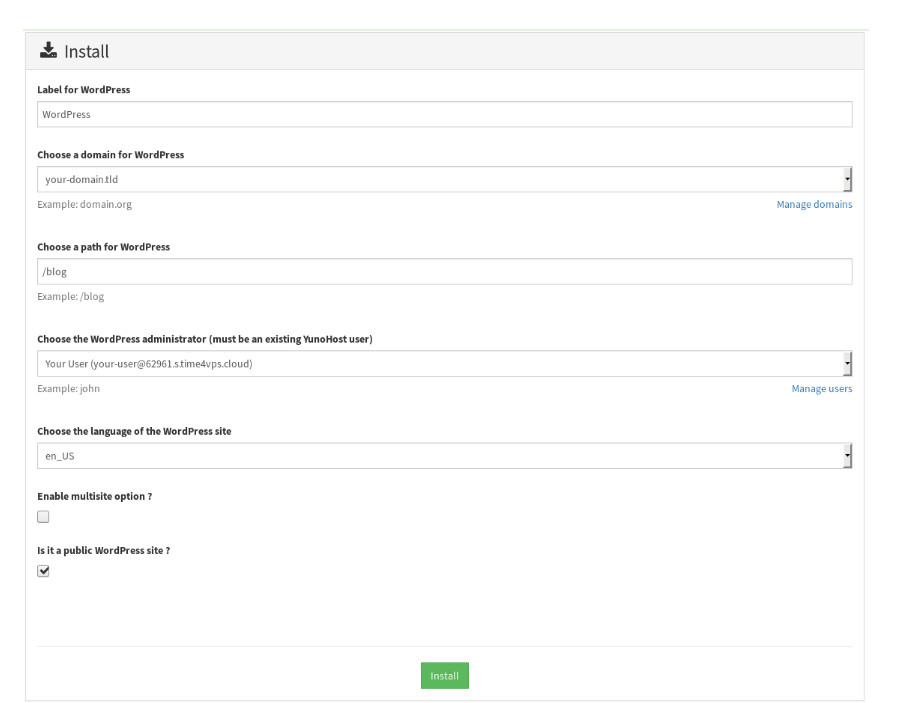
Browse the list of YunoHost-approved applications. Click "Install" next to the desired application and provide necessary details (e.g., for WordPress, enter your label, domain, and path). Click "Install" to complete.
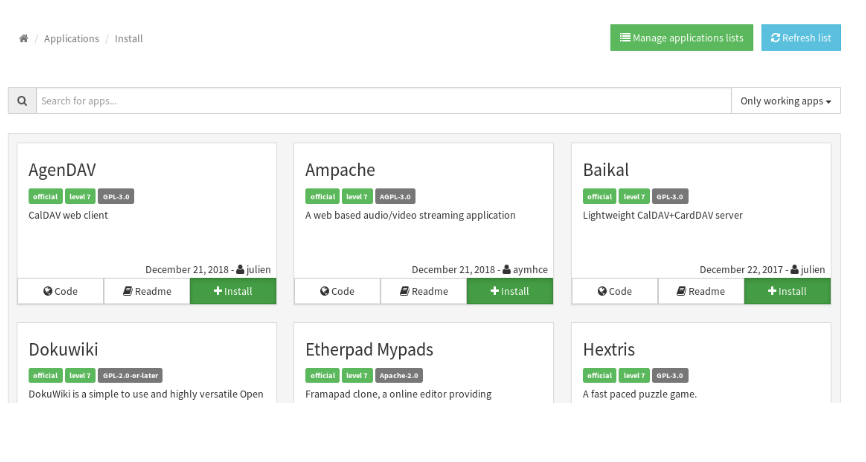
The application will appear in the "Application" section once installed.
Other Panel Sections
The initial five steps outlined are essential for configuring your YunoHost panel. Next, let's take a quick look at the remaining four sections of the home menu:

1. System Update
- Check for updates to the system or installed applications here.
2. Services
- Manage installed services. You can disable, enable, stop, or start services and view related logs. This is useful for troubleshooting issues with your VPS
3. Tools
- This section offers various server management tools, including diagnostics, firewall configuration, password changes, and VPS shutdown/reboot
4. Backup
To back up your VPS, go to "Backup" and click "New backup" under "Local archives". Select the sections to include in the backup and click "Backup".
Once complete, you can view and restore the backup from the "Local archives" category.
For more detailed information on YunoHost, refer to the official documentation.