
Introducing RunCloud: Your Ultimate Web Server Control Panel
RunCloud is a powerful web server control panel designed to simplify the management of your web applications and multiple websites. With RunCloud, you can effortlessly configure your web server (Apache or Nginx), set up tools like WordPress and Fail2Ban, create and manage databases, deploy popular scripts such as Joomla, Drupal, and Concrete5, and handle website tasks like installing SSL certificates and configuring automatic updates. Plus, RunCloud Backup lets you generate backups of your web applications.
In this tutorial, we'll guide you through connecting your server to RunCloud and setting up WordPress. Before we dive in, ensure your server meets the official RunCloud requirements.
RunCloud Requirements
Software Requirements:
- Operating System: Ubuntu 16.04, 18.04, or 20.04 (fresh installation)
- Linux VPS with kernel version 3.10+
Hardware Requirements:
- At least 1 core processor
- More than 1 GB of disk space
- Minimum 512 MB of RAM
- At least one IP address
If your server meets these requirements, you can proceed with the following steps to configure RunCloud on your VPS.
Configuring RunCloud
1. Create an Account:
- Sign up for a RunCloud account and verify your email address.
- Once verified, log in to your RunCloud account.
2. Connect a New Server:
- On the dashboard, click Connect a New Server.
- Select Server Provider: Others.
- Click Connect via IP Address.
- Enter a custom name for your server and its main IP address, then click Configuring your server.
- Choose the installation type: Direct Installation (enter your server’s root password) or Manual Installation (connect via SSH and run the bootstrapping script on your server)
.
3. Installation:
- The installation will take approximately 15 minutes. The script will automatically install required software and tools.
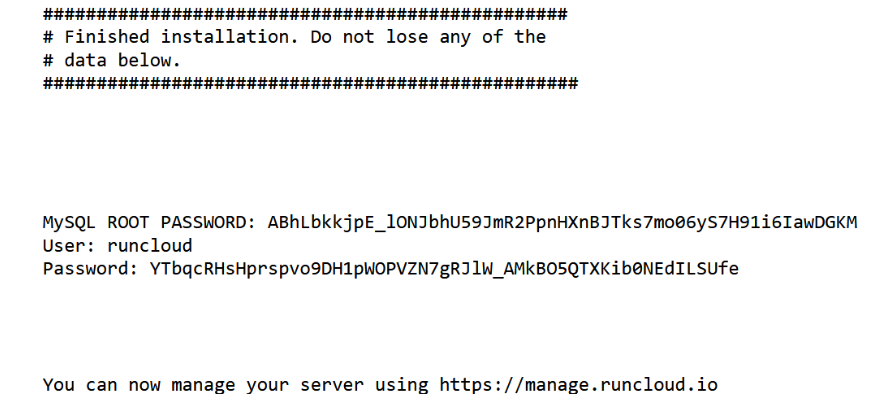
- After installation, save the provided MySQL password and RunCloud credentials.
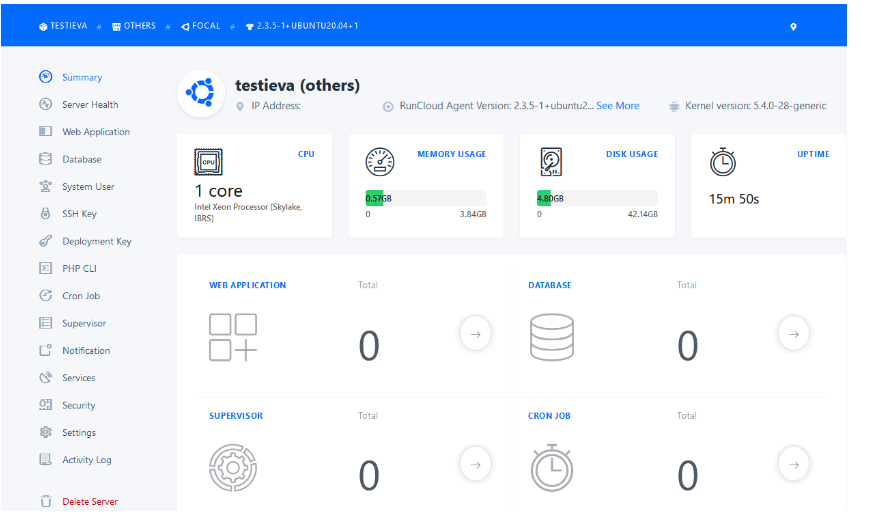
4. Server Summary:
You’ll be redirected to the server summary page, displaying resource usage, installed applications, and uptime.
Setting Up WordPress
1. Create a New Web Application:
- Go to Web Application and click Create Application.
- Choose 1 Click WordPress to install WordPress.

2. Enter Details:
- Web Application Name: Enter your application name.
- Domain Name: Enter your domain name.
- User: Use the default username 'runcloud' or create a new system user for enhanced security.
- Public Path: Leave as is.
- PHP Version: Select your preferred PHP version.
- Web Application Stack: Choose NGINX + Apache2 hybrid.
- WordPress Details: Enter your admin username and password, database username, password, name, and table prefix.
Finalize Installation:
- Click Add Web Application to create the app.
- Once created, you’ll see a summary page.
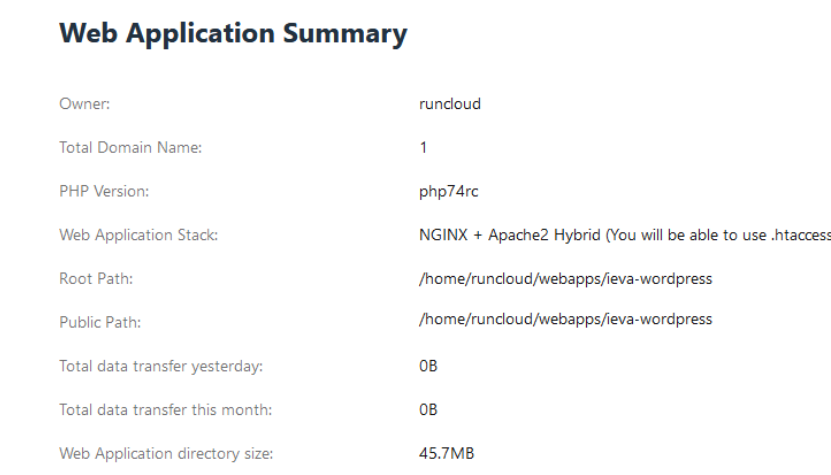
- Visit your website to see the default WordPress page. Access the WordPress admin page by adding /wp-admin to your domain or server’s IP address, using the admin credentials you provided during setup.
Managing Your RunCloud Web Application
Here are some of the key menus and tools available:
- SSL/TLS: Issue an SSL certificate for your domain, either a free Let's Encrypt or a custom certificate.
- File Manager: Access and manage your website files, change permissions, rename, delete, or modify code.
- Settings: Adjust PHP, web server settings, and environment configurations.
- Web Server Log: View access and error logs.
- Activity Log: Record all activity for your web application.
- Tools: Change or fix file or directory ownership permissions.
RunCloud offers a range of features to optimize your server, saving you time and simplifying server management. For more information and detailed management tips, visit the RunCloud website.