Our VPS offers the ability to upgrade the kernel version, which is a key reason why some customers prefer Linux VPS over Container VPS. Certain applications or services require a higher kernel version.
By default, the latest kernel version may not be available, so this guide will help you manually upgrade your kernel version.
Checking The Current Kernel Version
Before upgrading, it's important to know your current kernel version. You can check this by running the following command:

This command will provide an output similar to:
Linux 4.14.0-041400-generic
Kernel Upgrade for Ubuntu
Next, you’ll need to download the necessary files for your chosen kernel version. All available kernel versions can be found on this page:
Ubuntu Kernel Archive
This resource provides all the required files for the kernel upgrade. Once you've selected the specific version, you'll see multiple download links, such as:
linux-headers-4.13.0-041300_4.13.0-041300.201709031731_all.deb
linux-headers-4.13.0-041300-generic_4.13.0-041300.201709031731_amd64.deb
linux-headers-4.13.0-041300-lowlatency_4.13.0-041300.201709031731_amd64.deb
linux-image-4.13.0-041300-generic_4.13.0-041300.201709031731_amd64.deb
linux-image-4.13.0-041300-lowlatency_4.13.0-041300.201709031731_amd64.deb
The first file is required, and then you’ll need the other two files, making sure both are either "generic" or "lowlatency."
The first one is required, and then you need the rest of 2, which both has to match for example: both generic or both lowlatency.
You download all the files for example:
wget http://kernel.ubuntu.com/~kernel-ppa/mainline/v4.14/linux-headers-4.14.0-041400-generic_4.14.0-041400.201711122031_amd64.deb
wget http://kernel.ubuntu.com/~kernel-ppa/mainline/v4.14/linux-image-4.14.0-041400-generic_4.14.0-041400.201711122031_amd64.deb
wget http://kernel.ubuntu.com/~kernel-ppa/mainline/v4.14/linux-headers-4.14.0-041400_4.14.0-041400
Once the download is complete, install the files with:

This may take a few minutes. After installation, reboot the system to apply the changes:

Finally, verify that the kernel version has been upgraded:

Kernel Upgrade for CentOS
For CentOS, we’ll use ELRepo, a third-party repository, to upgrade to a recent kernel version. Start by enabling the repository with these commands:
rpm --import https://www.elrepo.org/RPM-GPG-KEY-elrepo.org
rpm -Uvh http://www.elrepo.org/elrepo-release-7.0-3.el7.elrepo.noarch.rpm
After installing the repositories, list the available packages:

You will be presented will all the available packages, like this:
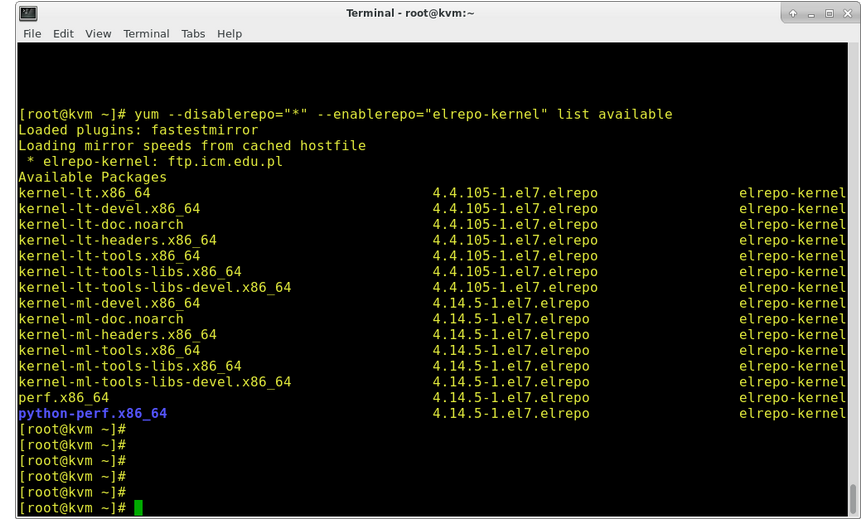
You'll see a list of available packages. Choose the main kernel package (kernel-ml) to upgrade:

Once the upgrade is complete, reboot the server:

Check the kernel version again:

If the kernel version hasn't changed, you'll need to set the default kernel version in GRUB. Open the GRUB configuration file:

Change the line to:

Then, recreate the kernel configuration within GRUB with:

Finally, reboot one more time to apply the changes.