This tutorial guides you through installing WordPress with Docker Compose on Ubuntu versions 16.04, 18.04, or 20.04.
WordPress is a widely-used content management system (CMS) that enables you to create and manage websites or blogs without requiring programming skills. By using Docker Compose, you can simplify the installation process, allowing you to deploy WordPress with a single command, thus saving time and effort.
1. What Are Docker and Docker Compose?
Docker is a tool that enables the easy creation, deployment, and management of applications through containers. Docker Compose is an extension of Docker that allows for defining and running multi-container applications. While Docker manages individual containers, Docker Compose handles applications made up of multiple containers, linking them together so they function as a cohesive unit.
How to Install WordPress Using Docker?
In this tutorial, you'll learn how to deploy a WordPress container along with a MySQL container for storing WordPress data. Docker Compose simplifies networking between these containers, allowing them to work together seamlessly.
1. Installing Docker
1.1 Update the package list:
sudo apt update
1.2 Install required packages:
sudo apt install apt-transport-https ca-certificates curl software-properties-common
1.3 Add Docker’s GPG key:
curl -fsSL https://download.docker.com/linux/ubuntu/gpg | sudo apt-key add -
You should see an "OK" message.
1.4 Verify the GPG key fingerprint:
sudo apt-key fingerprint 0EBFCD88
1.5 Add the Docker repository:
For Ubuntu 16.04 or 18.04:
sudo add-apt-repository "deb [arch=amd64] https://download.docker.com/linux/ubuntu $(lsb_release -cs) stable"
For Ubuntu 20.04:
sudo add-apt-repository "deb [arch=amd64] https://download.docker.com/linux/ubuntu focal stable"
1.6 Update the package index:
sudo apt update
1.7 Install Docker CE:
sudo apt install docker-ce
When prompted, type "Y" to confirm.
1.8 Add your user to the Docker group:
sudo usermod -aG docker $USER
After running this command, close and reopen your SSH session to apply the changes.
Verify Docker installation:
sudo systemctl status docker
docker run hello-world
2. Installing Docker Compose
2.1 Download Docker Compose:
sudo curl -L "https://github.com/docker/compose/releases/download/1.25.5/docker-compose-$(uname -s)-$(uname -m)" -o /usr/local/bin/docker-compose
Check for the latest version here and replace 1.25.5 if needed.
2.2 Set file permissions:
sudo chmod +x /usr/local/bin/docker-compose
Verify Docker Compose installation:
docker-compose --version
3. Setting Up WordPress with Docker Compose
You’ll need to create two containers: one for MySQL and one for WordPress. These will be set up using a docker-compose.yml file. Start by creating a new directory and navigating to it:
mkdir ~/wordpress/
cd ~/wordpress/
Use the nano editor to create the docker-compose.yml file with the following content:

Be sure to change the credentials (WORDPRESS_DB_PASSWORD, MYSQL_ROOT_PASSWORD, and MYSQL_PASSWORD) to your desired passwords, ensuring that MYSQL_PASSWORD and WORDPRESS_DB_PASSWORD match.
To start the installation, use the following command:
docker-compose up -d
If the code in docker-compose.yml file has been added correctly, you will see an output similar to the following:
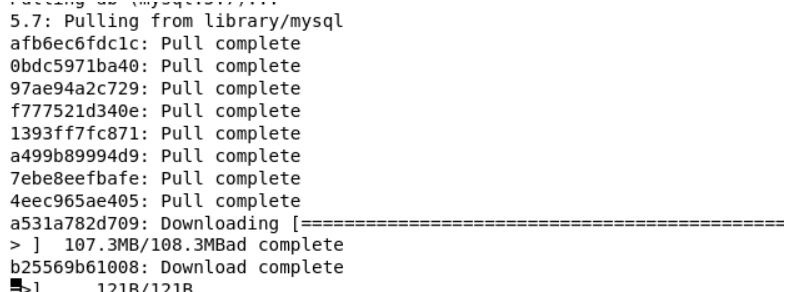
Then wait for the installation to be finished and you should see an output similar to the following:

If the docker-compose.yml file is configured correctly, you should see an output similar to this:
If you encounter an error like:
yaml.scanner.ScannerError: mapping values are not allowed here in "**C:\...\docker-compose.yml**", line x, column y
This indicates a syntax error in your docker-compose.yml file. You can use yamllint.com to check and fix the code.
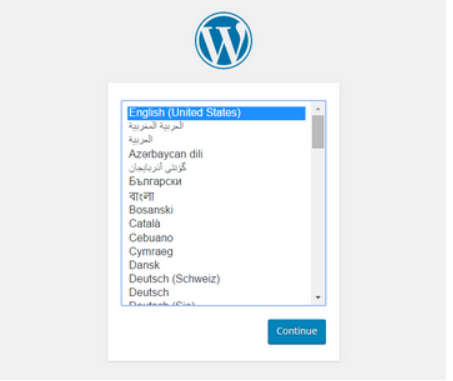
Once the installation is complete, open your server’s hostname or IP address in a web browser to access the WordPress setup page at http://publicIP/wp-admin/install.php.
Note: If your server’s operating system is not Ubuntu, refer to the relevant tutorial in Docker’s official documentation.