Introduction
aaPanel is an open-source server control panel designed to manage web hosting environments. It serves as a popular alternative to other well-known control panels like cPanel and VestaCP. With its user-friendly web interface, aaPanel simplifies the management of your hosting environment. It comes with a comprehensive set of features, including a file manager, SSL management, Cron jobs, firewall settings, FTP, email, databases, DNS, and more.
This guide will walk you through the process of installing aaPanel on your VPS.
Supported Operating Systems
- Debian 11, 12
- Ubuntu 20.04, 22.04
- AlmaLinux 9
- Rocky Linux 9
Please note: aaPanel can also be installed on AlmaLinux 8 and CentOS 7, but these versions have reached their End of Life (EOL) and are no longer supported. We recommend using AlmaLinux 9 or Rocky Linux 9 for Red Hat-based systems.
Important Warning
Before installing aaPanel, it is highly recommended to back up your server, especially if you have custom configurations. The installation process may alter certain system settings or install software that could affect your existing setup. Having a backup ensures that you can restore your server to its previous state in case something goes wrong during installation.
Installation Guide
1. Update the System
Before starting the installation, ensure your system is up-to-date.
For Ubuntu/Debian, run the following command:
apt update && apt upgrade -y
For RedHat-based distributions (AlmaLinux/Rocky Linux), use this command:
dnf update -y
2. Install Wget
Wget is a command-line utility used to download files. It’s required to fetch and run the installation script.
For Ubuntu/Debian, install wget with:
apt install wget
For AlmaLinux/Rocky Linux, run:
dnf install wget
3. Install aaPanel
To begin the installation, run the following command:
wget -O install.sh http://www.aapanel.com/script/install-ubuntu_6.0_en.sh && bash install.sh aapanel
During the installation, you'll be asked to confirm the installation in the /www directory. Press "Y" and then Enter to continue.
The installation process may take some time.
Once complete, the default username and password will be displayed. Save these credentials for future access.

4. Connect to aaPanel
The installation script will also provide a link to access aaPanel. Use the internal address (IPv4) to open the link in your browser.
On the first connection, you may receive a warning about an unsecured connection, which is normal. Proceed without issue.
The aaPanel login page will appear. Enter the credentials you saved earlier.
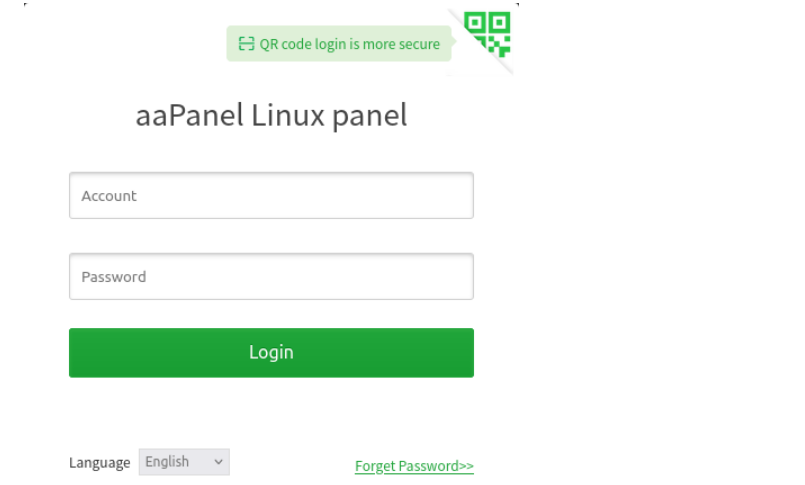
Upon logging in, the aaPanel dashboard will be displayed, and an installation wizard will guide you through setting up LAMP or LNMP on aaPanel.
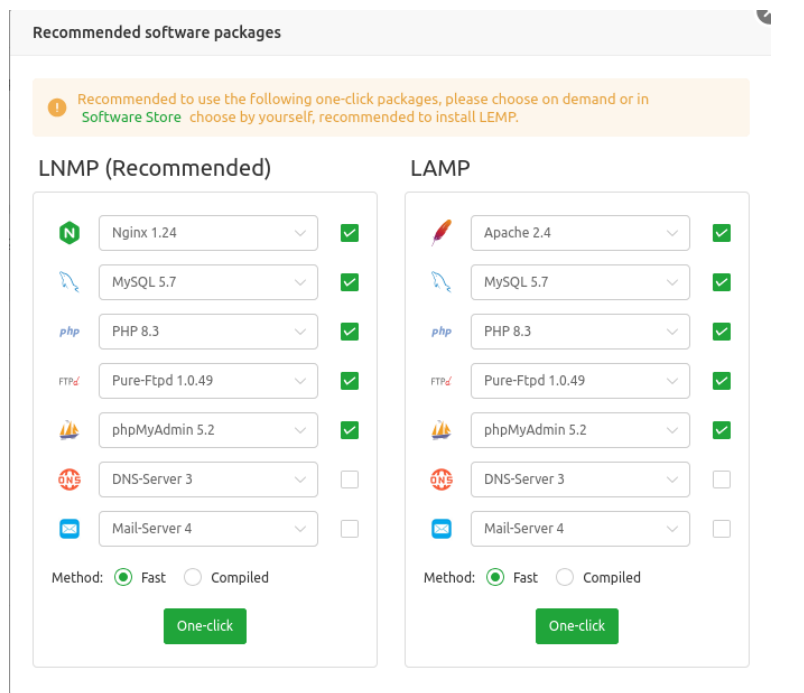
You can click "One Click" to choose your preferred web server (Apache, Nginx, or OpenLiteSpeed), PHP version, and database (MySQL, MariaDB, or PostgreSQL). Follow the prompts to complete the setup. If these components are not required, you can skip the wizard and proceed directly to the dashboard.
From the dashboard, you can monitor and manage your server.
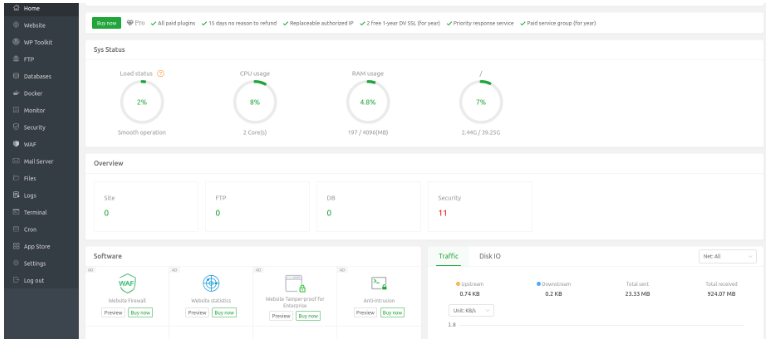
Post-Installation Configuration
1. Change the Default Admin Password
It’s recommended to change the default password for enhanced security. After logging into aaPanel, go to "Settings" and modify the "Global" settings section.
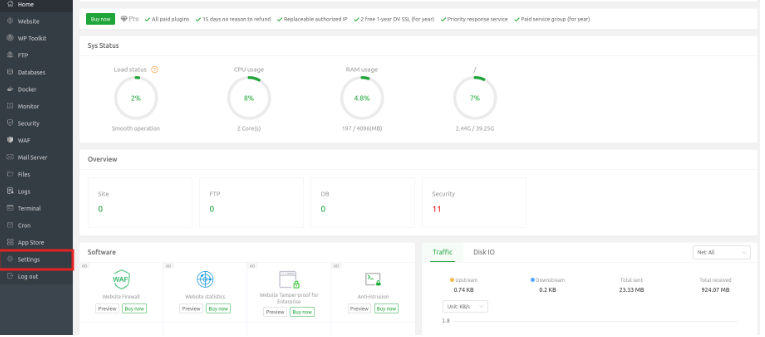
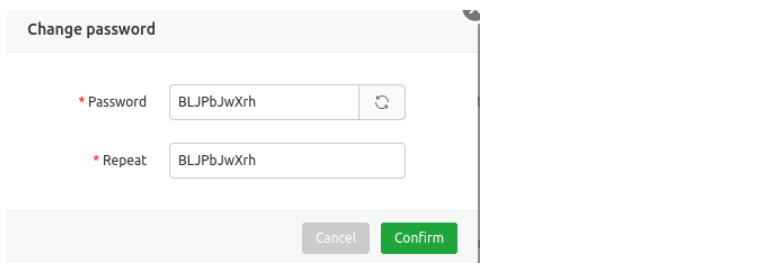
Click "Modify" to change the username and password. aaPanel will generate a strong password by default.

You can regenerate it by clicking "Reload," then click "Confirm" to save.
2. Change the Default Port
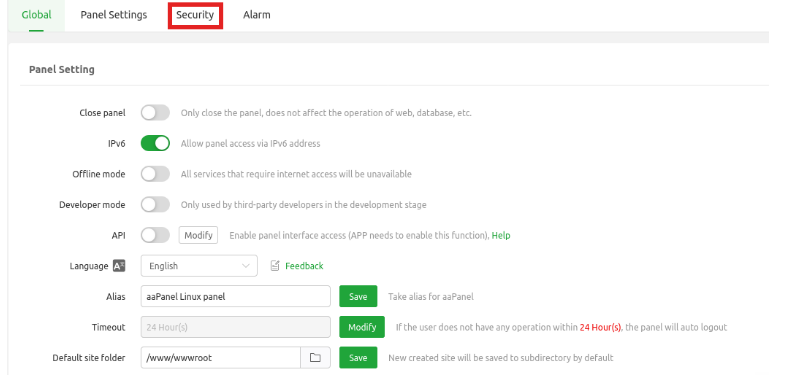
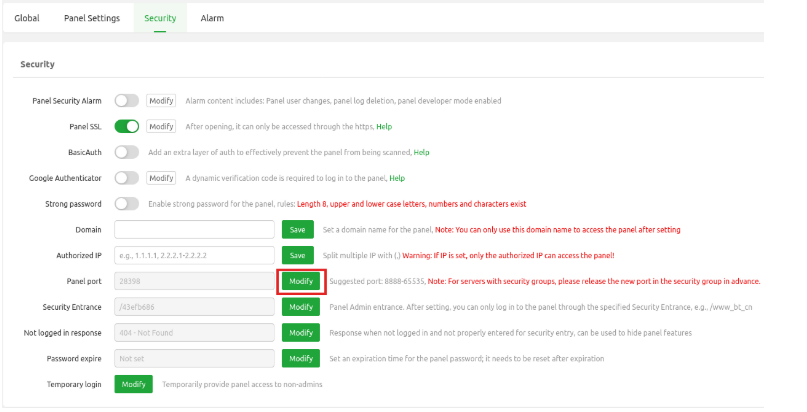
For added security, it’s advisable to change the default aaPanel port. In the aaPanel dashboard, navigate to "Settings" > "Security."
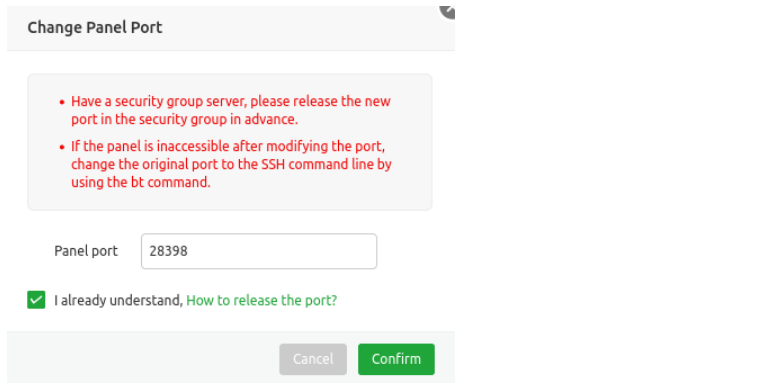
Click "Modify" next to "Panel Port" and enter a new port number between 8888 and 65535.
3. Adjust the Timeout Duration
The default timeout for aaPanel is 24 hours. To change it, go to "Settings" > "Global" and click "Modify" next to "Timeout."
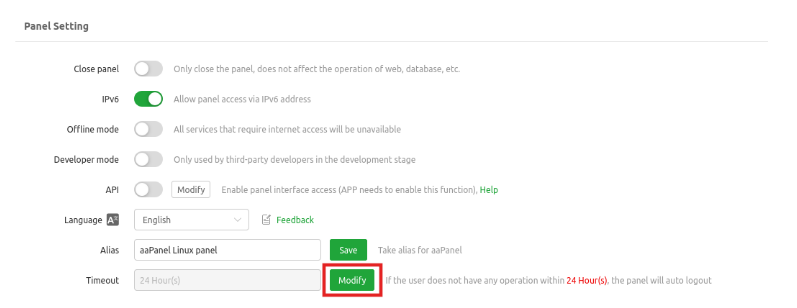
Select "Custom," enter your preferred timeout duration, and click "Confirm."

aaPanel Pricing
While the core features of aaPanel are free, premium plugins and support options are available for purchase. For more details on pricing and plans, visit the official aaPanel website.
Conclusion
This guide covered the installation and basic security configuration of aaPanel, including changing the default password, modifying the port, and adjusting the timeout duration. By following these steps, you can secure your server and manage it effectively through the aaPanel dashboard.