Introduction
HestiaCP is a free, open-source server control panel that simplifies the management of websites, emails, databases, and other server services. With an intuitive user interface, it provides an easy way to configure and oversee your server.
This guide will walk you through the installation of Hestia on Ubuntu 20.04 & 22.04 and Debian 11 & 12. Please note that Hestia is not supported on Ubuntu 24.04.
Important Warning
It is recommended to install Hestia on a fresh, clean server. Before proceeding, create a backup of your server, particularly if it contains custom configurations. The installation could modify system settings or install software that might conflict with your current setup. A backup will help restore your server to its original state in case any issues arise during installation.
The installation process will automatically install several essential components for Hestia to run, including:
- NGINX Web/Proxy Server
- Apache Web Server (Backend)
- PHP-FPM Application Server
- Bind DNS Server
- Exim Mail Server + ClamAV + SpamAssassin
- Dovecot POP3/IMAP Server
- MariaDB Database Server
- Vsftpd FTP Server
- Firewall (iptables) + Fail2Ban Access Monitor
Installation Guide
1. Update the System
Start by updating your system to ensure everything is up to date:
apt update && apt upgrade -y
2. Install wget
Next, ensure that wget is installed on your server. If not, use the following command:
apt install -y wget
You can verify the installation by running:
wget --version
3. Install Hestia
Now, download and install Hestia using the following commands:
wget https://raw.githubusercontent.com/hestiacp/hestiacp/release/install/hst-install.sh
chmod +rw hst-install.sh
bash hst-install.sh
During the installation, you will be prompted to remove conflicting packages by typing 'y'. You will also need to enter your email and domain name. If you prefer using the default server hostname, just press Enter without typing anything.
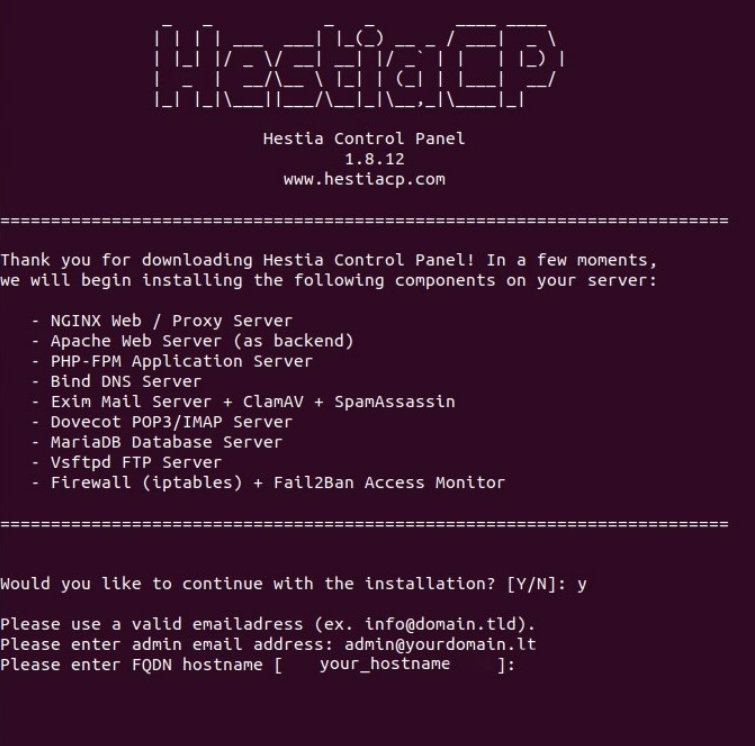
The installation may take some time. After it completes, the Hestia username (admin), password, and control panel URL will be displayed. Make sure to save these details for future reference. Your server will automatically reboot after installation.
4. Install Let's Encrypt
To secure your connection, install Let's Encrypt by running the following commands:
apt-get update
apt-get install -y software-properties-common
apt-get install -y letsencrypt
Next, generate the SSL certificate with:
v-add-letsencrypt-host
If you encounter the error "Error: Let's Encrypt SSL creation failed," ensure that both Apache and NGINX are temporarily stopped, then try again:
systemctl stop apache2
systemctl stop nginx
v-add-letsencrypt-host
Afterward, restart Apache or NGINX:
systemctl start apache2
service apache2 start
Once the certificate is installed, restart Hestia:
service hestia restart
5. Connect to Hestia
To access Hestia, use the Admin URL provided during installation. Typically, it’s your server's hostname or domain (if specified), followed by port 8083:
https://your_hostname:8083
You will be prompted to log in. Use the credentials saved earlier.
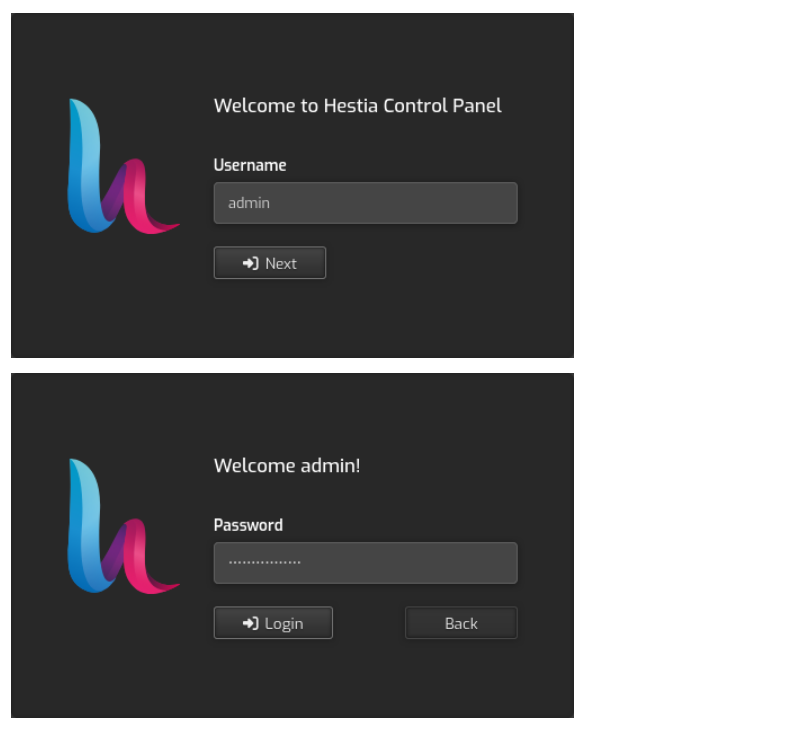
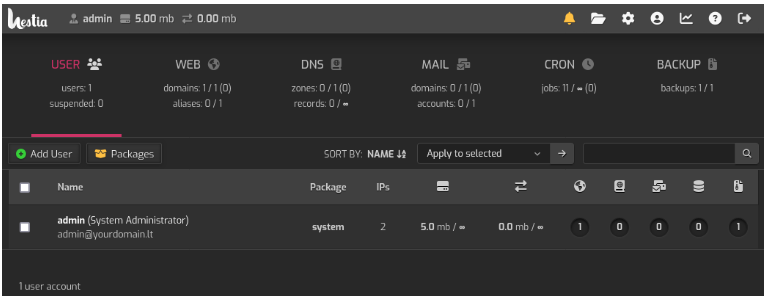
After logging in, you'll be directed to the Hestia dashboard, where you can manage your server.
Post-Installation Configuration
1. Change the Default Admin Password
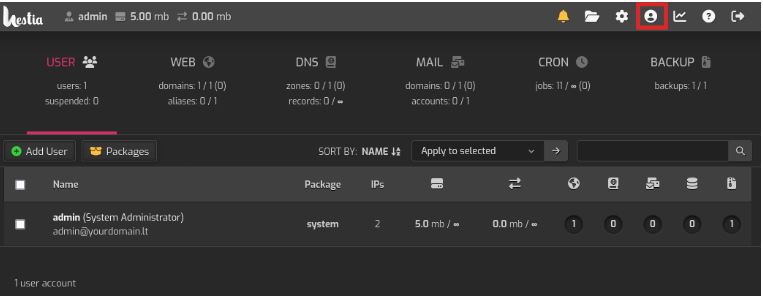
For security purposes, change the default admin password. Navigate to the account management page by clicking on the account logo.
In the Password field, either generate a new password by clicking the "reload" button or manually enter a new password that meets Hestia’s requirements.
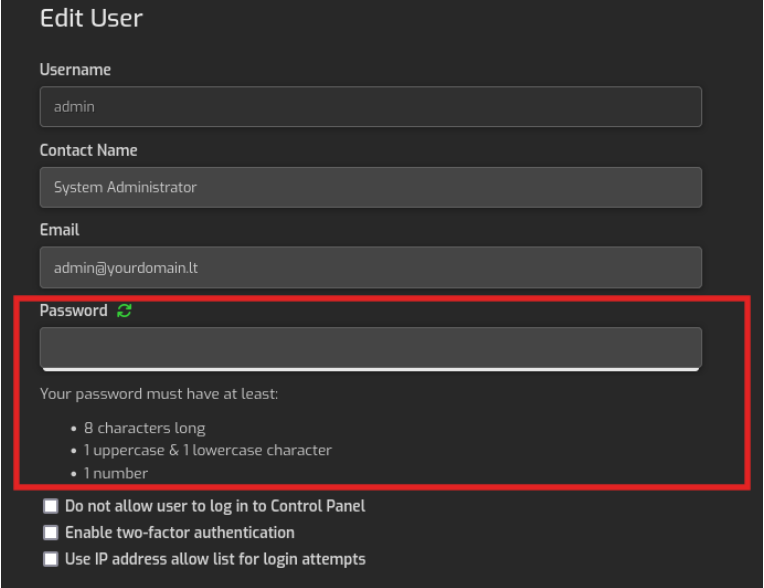
Click "Save" to apply the changes.

2. Enable Two-Factor Authentication (2FA)
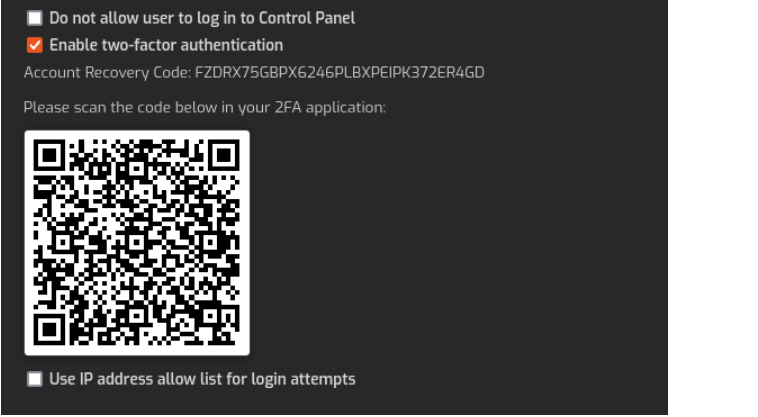
For enhanced security, enable 2FA. On the same account management page, check the "Enable two-factor authentication" box and click "Save." A QR code will appear. Scan it with your 2FA app (e.g., Google Authenticator) to add the new account.

After setup, you’ll need both your password and the temporary code generated by your 2FA app to log in.
Please Note
You can configure other security features like the allowed IP list to restrict access to the control panel. Be cautious when doing this, as only the listed IP addresses will be able to log in. If you're locked out, you may have trouble accessing the panel, so ensure you have access from the allowed IP address.

For additional firewall configurations, refer to the official documentation to avoid issues.
Conclusion
Congratulations! You’ve successfully installed Hestia on your server. With its intuitive interface and powerful features, Hestia makes it easy to manage your server, websites, email, and DNS. This guide covered the installation steps and the process to improve security by updating the default password and enabling two-factor authentication (2FA). You're now ready to manage your server with the Hestia Control Panel!